
How to Make a Bridal Money Bag: A Detailed Guide
Creating a bridal money bag is a thoughtful and personalized touch for any wedding. It’s a way to give your guests a keepsake that they can cherish for years to come. Whether you’re looking to make a simple, elegant bag or a more intricate, decorative piece, this guide will walk you through the process step by step.
Materials Needed

Before you start, gather all the necessary materials. Here’s a list of what you’ll need:
| Material | Quantity |
|---|---|
| Fabric | 1 yard |
| Thread | 1 spool |
| Scissors | 1 pair |
| Measuring tape | 1 |
| Embroidery hoop | 1 |
| Embroidery needle | 1 |
| Embroidery floss | Assorted colors |
| Pattern paper | 1 sheet |
| Glue stick | 1 |
| Seam ripper | 1 |
Step 1: Cutting the Fabric
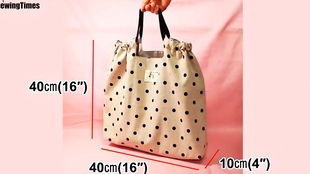
Start by cutting your fabric to the desired size. For a standard bridal money bag, you’ll need a rectangle that’s 10 inches wide and 15 inches long. Make sure to leave an extra inch on all sides for seam allowances.
Step 2: Sewing the Bag

With right sides together, pin the fabric together. Sew along the long edges, leaving a 1/2-inch seam allowance. Turn the fabric right side out and press the seams flat.
Step 3: Adding Embellishments
This is where you can get creative. You can add embroidery, lace, or even a monogram. If you’re adding embroidery, hoop your fabric and thread your needle with the desired color. Follow the pattern to create your design.
Step 4: Creating the Closure
For a simple closure, you can add a button and a loop. Cut a strip of fabric that’s 2 inches wide and 10 inches long. Fold it in half lengthwise and sew the ends together to create a loop. Attach the loop to the top of the bag with a few stitches. Sew a button to the opposite side of the bag to match the loop.
Step 5: Adding a Lining
For a more polished look, add a lining to your bag. Cut a piece of fabric that’s 9 inches wide and 14 inches long. Sew the sides together, leaving a 1/2-inch seam allowance. Turn the fabric right side out and press the seams flat. Insert the lining into the bag, making sure the right sides are together. Sew the lining to the bag, leaving the top open.
Step 6: Final Touches
Now that your bag is complete, add any final touches. You can add a decorative ribbon, a tag with a message, or even a small envelope for the money. Make sure to iron the bag to remove any wrinkles and ensure it looks its best.
Step 7: Fill the Bag
Finally, it’s time to fill the bag. Place the money inside, making sure it’s neatly folded. You can also add a small card or note with a personal message for your guests.
Creating a bridal money bag is a rewarding project that allows you to add a personal touch to your wedding. With a bit of creativity and patience, you can make a beautiful and memorable keepsake for your guests.


