
How to Make an Origami Money Ring: A Step-by-Step Guide
Origami, the ancient Japanese art of paper folding, has captivated people around the world with its intricate designs and simple beauty. One of the most popular origami projects is the money ring, a clever and practical way to store cash. Whether you’re a beginner or an experienced folders, this guide will walk you through the process of creating your own origami money ring.
Materials Needed

Before you start, gather the following materials:
| Item | Description |
|---|---|
| Paper | Use a square piece of paper, ideally 6 inches by 6 inches. The paper should be thick enough to hold its shape but not so thick that it’s difficult to fold. |
| Scissors | Optional, for trimming the paper to the perfect size. |
| Glue | Optional, for securing the ends of the ring. |
Step 1: Prepare Your Paper
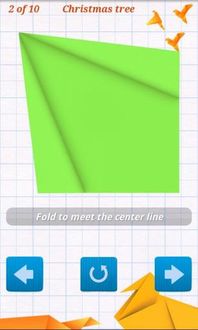
Start by folding your square piece of paper in half diagonally, then unfold it. Fold it in half again, this time vertically, and unfold it. You should now have a cross shape with creases running through the center.
Step 2: Create the Base

Take one of the corners of the square and fold it to the center point of the opposite side. Crease well and unfold. Repeat this process with the other three corners. You should now have a diamond shape with creases running through the center.
Step 3: Fold the Diamond
Take the top point of the diamond and fold it down to the bottom point, creating a triangle. Crease well and unfold. Repeat this process with the other three points, so you now have a smaller diamond shape.
Step 4: Fold the Triangle
Take the top point of the smaller diamond and fold it down to the bottom point, creating a triangle. Crease well and unfold. Repeat this process with the other three points, so you now have a smaller triangle shape.
Step 5: Create the Ring
Take the top point of the triangle and fold it down to the bottom point, creating a loop. Crease well and unfold. Repeat this process with the other three points, so you now have a loop shape. Take the loop and fold it in half, creating a ring. Crease well and unfold.
Step 6: Secure the Ring
Take the two ends of the ring and fold them inwards, creating a small triangle. Crease well and unfold. Repeat this process with the other two ends. Take the two triangles and fold them inwards, creating a small loop. Crease well and unfold. Finally, take the two loops and fold them inwards, creating a small triangle. Crease well and unfold.
Step 7: Final Touches
Take the two ends of the ring and fold them inwards, creating a small triangle. Crease well and unfold. Repeat this process with the other two ends. Take the two triangles and fold them inwards, creating a small loop. Crease well and unfold. Finally, take the two loops and fold them inwards, creating a small triangle. Crease well and unfold.
Now, take the two ends of the ring and fold them inwards, creating a small triangle. Crease well and unfold. Repeat this process with the other two ends. Take the two triangles and fold them inwards, creating a small loop. Crease well and unfold. Finally, take the two loops and fold them inwards, creating a small triangle. Crease well and unfold.
Step 8: Finishing Up
Take the two ends of the ring and fold them inwards, creating a small triangle. Crease well and unfold. Repeat this process with the other two ends. Take the two triangles and fold them inwards, creating a small loop. Crease well and unfold. Finally, take the two loops and fold them inwards, creating a small triangle. Crease well and unfold.
Now, take the two ends of the ring and fold them inwards, creating a small triangle. Crease


